
Speaking Fluency
SKILLS
EFL 4.2.11 Give short, basic descriptions of everyday activities and events within familiar contexts and use simple descriptive language to compare and make brief statements about objects and possessions.
EFL 4.2.13 Interact with reasonable ease in structured situations and short conversations within familiar contexts, provided that speech is given clearly, slowly and directly.
REAL-LIFE APPLICATION

This topic helps students speak more naturally when they describe images, memories, places, activities, or events. Students often know vocabulary but freeze when they need to speak for more than a few seconds. Photo description gives them a visual support, so they can learn to organize ideas, continue speaking, use details, and interact with a partner. This is useful for oral exams, classroom presentations, storytelling, describing trips, explaining projects, and participating in English conversations without stopping immediately.
LEARNING ACTIVITIES
SESSION 1 (80 min) ANTICIPATION
Part 1: Freeze the Video, Speak the Photo (20 min)
Describe a photo or picture
VIDEO
The teacher plays a short YouTube video about describing photos, but pauses it after the first 30–45 seconds. Students do not copy the video. They observe what the speaker is doing.
The teacher asks:
- What did the speaker describe first?
- Did the speaker mention people, place, action, or details?
- Did the speaker speak quickly or slowly?
- Did the speaker stop when they did not know one word?
- What phrase helped the speaker continue?
Then the teacher shows a new photo and asks students to produce only one sentence first. This lowers anxiety.
Example:
“I can see students.”
“They are working together.”
“They are in a classroom.”
“They look focused.”
The teacher explains that descriptive fluency does not mean speaking perfectly. It means speaking clearly, continuing with details, and using simple strategies when the student does not know a word.
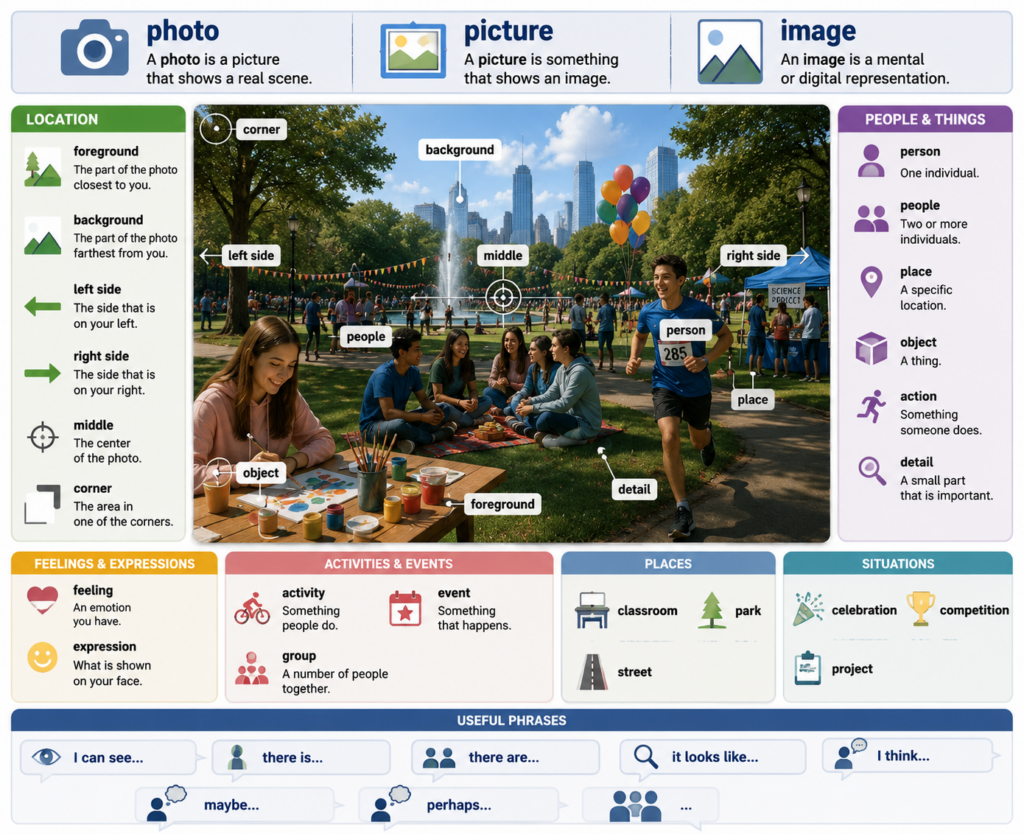
Part 2: Vocabulary Activation: Photo Voice Buttons (15 min)
The teacher shows one photo. Students press or choose one button and must say one sentence connected to that category.
- photo
- picture
- image
- foreground
- background
- left side
- right side
- middle
- corner
- person
- people
- place
- object
- action
- detail
- feeling
- expression
- activity
- event
- group
- classroom
- park
- street
- celebration
- competition
- project
- maybe
- perhaps
- it looks like
- I think
- I can see
- there is
- there are
Part 3: Speaking Language Input: The 6-Step Photo Description Path (25 min)
The teacher explains that a good photo description follows a path. Students should not jump randomly from one detail to another. They can use the same path every time they describe a photo.
Step 1: General idea
Start with the big picture. Do not begin with a tiny detail.
Useful phrases:
“This photo shows…”
“I can see…”
“This picture is about…”
“It looks like a…”
Example:
“This photo shows students working together.”
Step 2: Place
Say where the scene is happening.
Useful phrases:
“They are in…”
“The photo was probably taken in…”
“It looks like a classroom / park / school / street.”
Example:
“They are in a classroom.”
Step 3: People and actions
Use Present Continuous to describe what is happening now in the photo.
Structure:
subject + am / is / are + verb-ing
Examples:
“The students are writing.”
“The teacher is explaining something.”
“Two boys are playing basketball.”
“A girl is holding a microphone.”
Step 4: Location in the photo
Use simple position language.
Examples:
“In the foreground, I can see a table.”
“In the background, there are some students.”
“On the left, a boy is standing.”
“On the right, there is a window.”
Step 5: Feelings and guesses
Students cannot know everything from a photo, so they should use safe speculation.
Useful phrases:
“Maybe…”
“Perhaps…”
“I think…”
“It looks like…”
Examples:
“Maybe they are preparing a presentation.”
“I think they feel excited.”
“It looks like a school event.”
Step 6: Opinion or connection
End with a personal reaction.
Examples:
“I like this photo because it shows teamwork.”
“This reminds me of my class.”
“I think this activity is interesting because students are helping each other.”
The teacher models a full answer:
“This photo shows a group of students in a classroom. They are sitting around a table, and they are working on a project. In the foreground, I can see notebooks and a laptop. In the background, there are more students. The group looks focused, and maybe they are preparing a presentation. I like this photo because it shows teamwork.”
Part 4: Photo Walkie-Talkie Mission (20 min)
This activity is designed differently from previous rotations or stations. Students work back-to-back.
Student A sees a photo. Student B cannot see it. Student A describes the photo like a walkie-talkie message. Student B must draw a very simple version or arrange objects on the desk to represent the photo.
Rules:
- Student A cannot point.
- Student A cannot use Spanish.
- Student A must describe the big picture first.
- Student B can ask clarification questions.
Useful language:
“Can you repeat that?”
“Where is the person?”
“What is in the background?”
“Is there a table?”
“How many people are there?”
At the end, students compare the drawing or object arrangement with the photo. The goal is not artistic accuracy; the goal is clear communication.
SESSION 2: CONSTRUCTION – REINFORCEMENT (40 min)
Part 1 – Photo Soundtrack Match (15 min)
The teacher plays short sound effects: applause, rain, school bell, traffic, crowd noise, birds, cafeteria noise, sports cheering, typing, or music rehearsal. Students choose which projected photo matches the sound and explain why.
Example:
“This sound matches photo B because the people are playing sports.”
“I think this photo matches the rain sound because people are using umbrellas.”
“The cafeteria noise matches photo C because students are eating.”
This activity helps students describe atmosphere, not only visible objects.
Part 2 – One Photo, Three Voices (15 min)
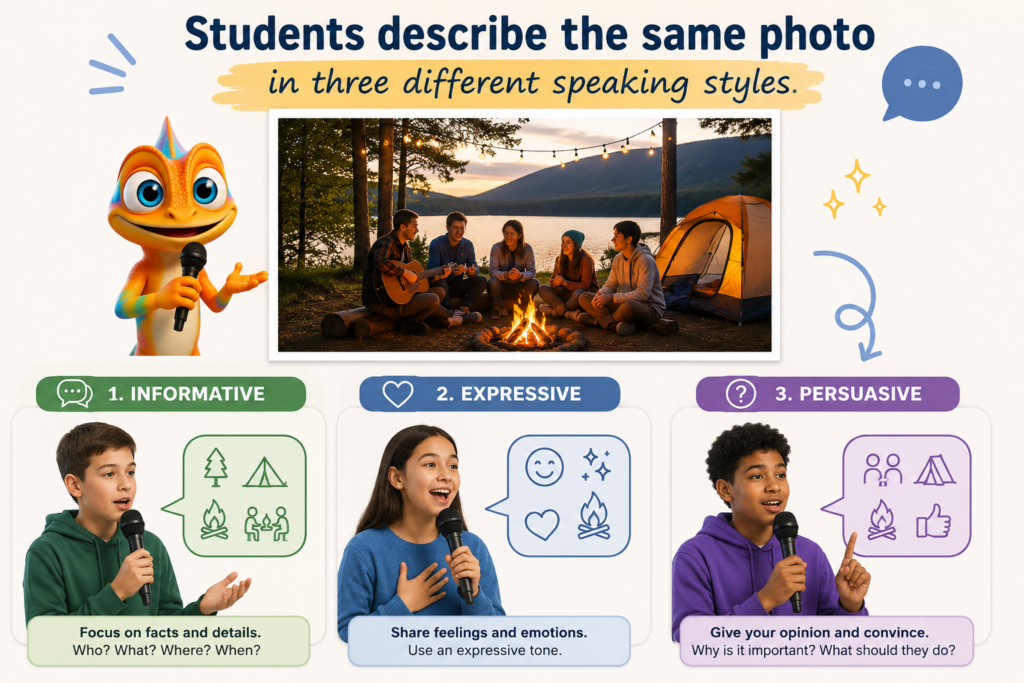
Students describe the same photo in three different speaking styles.
Voice 1: basic description
“I can see students in a classroom.”
Voice 2: excited reporter
“I’m here in a very active classroom! Students are working together and sharing ideas.”
Voice 3: calm observer
“The photo shows a quiet classroom where students are completing a project.”
This helps students practice pace, voice, expression, and fluency. Students learn that speaking is not only grammar; it also includes tone, rhythm, and confidence.
Part 3 – Exit Photo Line (10 min)
Each student describes one photo in 20 seconds using:
- one general sentence
- one action sentence
- one detail
- one guess
Example:
“This photo shows a school event. Students are standing near a table. In the background, I can see posters. Maybe they are presenting a science project.”
SESSION 3: CONSOLIDATION (80 min)
Part 1 – Preparation: Photo Voice Test Warm-Up (15 min)
Students prepare for the speaking test. They do not write scripts. They create a five-word note line only:
- place
- people
- action
- feeling
- guess
Example:
classroom / students / writing / focused / project
The teacher reminds them that notes are not full sentences. They are only support.
Part 2 – Speaking Fluency Test: Photo Description + Interaction (50 min)
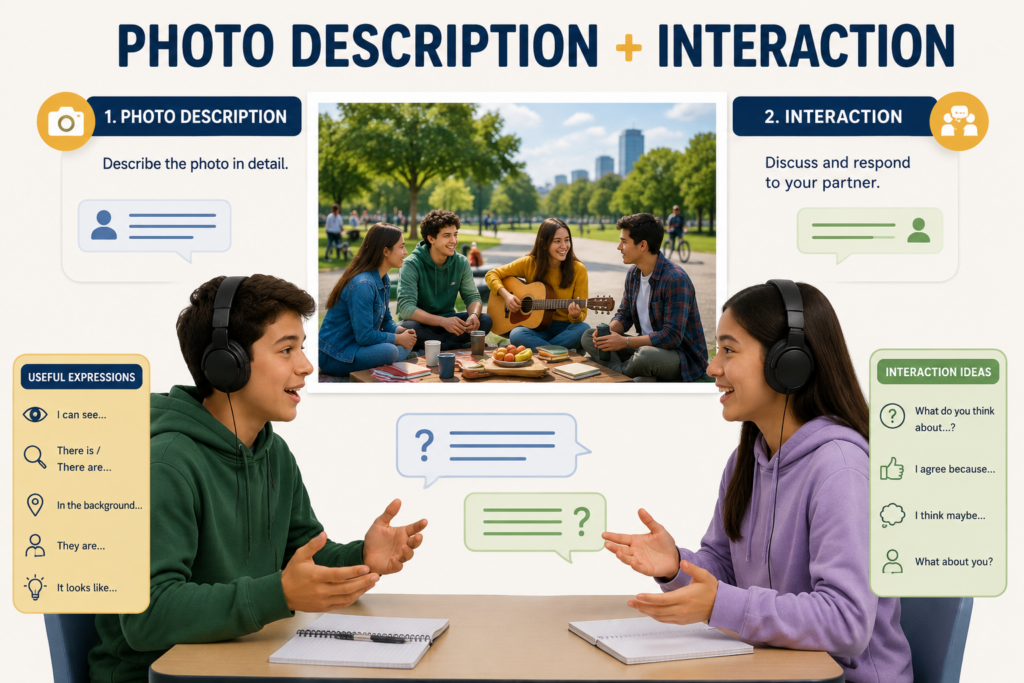
This is the consolidation test.
Students work in pairs.
Part A: Individual photo description
Each student receives a photo and speaks for 45 seconds.
Required:
- describe the place
- describe people or objects
- use Present Continuous
- use location language
- make one simple guess
- give one opinion
Part B: Partner questions
The partner asks two questions about the photo.
Examples:
“What are the people doing?”
“How do they feel?”
“What might happen next?”
“Do you like the photo? Why?”
Part C: Collaborative choice
The pair receives two photos and chooses which one would be better for a school poster. They must discuss for one minute and reach a decision.
Useful language:
- “I think this photo is better because…”
- “What do you think?”
- “I agree because…”
- “Maybe this photo is clearer.”
TEST:
Speaking Fluency Test
Part 3 – Fluency Reflection Snapshot (15 min)
Students complete an oral reflection.
Questions:
What helped you speak longer?
What phrase helped you continue?
What was difficult: describing, guessing, or answering questions?
What will you improve next time?

RUBRIC: Speaking Fluency
NEE – Agregar el tipo de adaptaciones curriculares
Principio II: Pautas 6.1 – 6.3 – 6.4
Principio III: Pautas 7.1 – 8.1 – 9.1
ALUMNO 1: Constante monitoreo. Dar tiempo adicional para el desarrollo de la actividad y se reduce el número de ejercicios o se modifican los ejercicios con un nivel de dificultad reducido, de acuerdo con sus necesidades académicas.
ALUMNO 2: Constante monitoreo, Dar tiempo adicional para el desarrollo de la actividad y se reduce el número de ejercicios o se modifican los ejercicios con un nivel de dificultad reducido, de acuerdo con sus necesidades académicas.
ALUMNO 3: Constante monitoreo. Corroborar que el contenido entregado en clase haya sido comprendido por la estudiante mediante retroalimentación.